Showing posts with label Decorations- DIY. Show all posts

Thursday, December 4, 2014

Easiest DIY Christmas ball ever!

This is really the easiest way to make a very nice Christmas ball to hang in the tree. 

Since all my decorations for this year are white, then the materials for this tiny projects are both white. I am sure if you use different colors will look even better!


Wire balls are amazing! you can put so many things inside and so fast! So all I did was to put the decorative star inside (as I said, I think with a different color will look much better) and the ball was: DONE!!!   I did not even take more than a minute!

and just like that... the ball was ready to be hanged!

Play with the elements you have. I am sure that with a little bit of creativity you can find many other things you could put inside this wire balls. 

Purple and gold Christmas (2012)

Every year I like to decorate with new colors, but as I have said before I think it is always important to buy the basic tones first. Such as: gold, silver and white, because then we just have to buy every year a few decorations of the extra color. You all know every year there is a color that is "IN" that year. 

I have been looking for Christmas pictures of the last years and I found a few ones of 2012. You can see how I decorated the tree and how I packed the Christmas gifts. You can notice some natural decorations (oranges and pine cones). I love pine cones so much, they are elements that never have to miss in Christmas.


In 2012 by this time we had already some snow, this year apparently snow doesn´t want to show off. I will have to be patient! :)


Wednesday, December 3, 2014

Christmas tree

Merry Christmas to you all!!

We are finally in December and I finally have a Christmas tree. 
I show you some of the first pictures I have took of it. Hope you like it. It is still not 100% done! I am missing the star at the top of the tree, but soon I will load a few more pictures of the final result.


Monday, December 1, 2014

Re-using an old painting

Some years ago I received a painting as a gift. The colors looked a bit sad, and it didn´t really match with any of the colors that I had in my apartment. 


This is the original painting. Since it was a gift I didn´t want to give it away.


This is how the painting looks like after a few modifications. Basically what I did was to give it new colors to make it match to the colors I have used in my living room ( since it is in this room where I wanted to hang it). 

You can take this an idea when you receive a gift that do not match with the rest of the colors in your place. Do not give them away, just take your pincel and some paintings and make it look just as if it was made for your room!

Thursday, November 27, 2014

2 wreaths - 5 different decorations

If we want to change the decoration in our home, that does not mean that we have to buy new decorations every single time. A good suggestion that I can give you is to always buy "basic elements" that we can always use and simple add a few accessories to decorate them. 

I have in total 4 wreath, but all of them are made of a different material or have a different size. This are my main decoration objects. I think I reuse them like 3 or 4 times a year (Easter, Autumn, Christmas, etc)

Today I show you how I have decorated one wreath in 3 different ways.
WREATH N°1-Easter

WREATH N°1-Christmas 2013

WREATH N°1-Christmas 2012

Now I show you wreath N°2 and the two different Christmas decorations.

WREATH N°2-Christmas 2013


I love the kissing couple from Delft. Individually it cannot be considered as a Christmas decoration element, but together with the wreath... I found it lovely. 

Isn´t lovely to spend Christmas with that special person? ♥


WREATH N°2-Christmas 2014


Monday, November 17, 2014

4 easy Christmas (IKEA) table decoration Ideas

Christmas is the time of the year when I want to decorate absolutely everything! Today I show you 3 easy ideas of how to decorate: a bank, a center table and the dinning table. I really enjoy to show in my blog how to create easy and simple but super cute and inexpensive decorations. 

A few Christmas elements add up to one dashing display.

You can notice that the elements that I have used are in most of the cases things that can be found in the nature, such as: pine cones, pine branches, hazelnuts, etc.

center table

dining table-Option N°1

bank (now a little corner table)

dining table-Option N°2


Candles are a MUST in Christmas, so in all my decorations I try to use candles.

Do not be afraid of mixing different elements for decoration as I said, just experiment and mix things. This decorations make a lovely holiday accent. 

Christmas wreath

Finally my favorite time of the year is coming and so my DIY Christmas decorations. Are you as excited as me to celebrate such an amazing time with family and friends?

Well, here I show you my first Christmas decoration of the year: a wreath. You all know there can´t be a Christmas without one! 

In the next picture you can see the materials we are going to need for this easy project.

After knowing the elements that we are going to need, we start the decoration by sticking the pine branches in the wreath and then the pine cones.

Now we hang the little Christmas balls and the decorative stars. As you can see... in less than 15 minutes our beautiful wreath is ready to be hanged.


Tuesday, October 7, 2014

Welcome Stand with plant basket

This little project is very simple. It does not involve a lot of time and it does not contain a lot of elements. 

For a couple of weeks I found this plant basket. For my good luck it was on discount. I have been wanting something like this since long time ago. I think such things look nice at the front door, because it transmit a warm feeling to the visitors. 


Looked quite simple, but in my head I already had the image of how this plant basket was going to look at the end. 

The next day I went to buy a couple of plants. The main colors were pink and green. As I had all the elements needed for my little project, it did not take so long until I finished it.


This is how the plant basket looked after planting the flowers, cute but not complete. 


And this was the final result.

As the plants continue growing it will look much much better.


-----------------------------------------------------------------------------------
I hope you like what I publish on my blog. You can take all this as ideas to start creating your own self made gifts. The love put on making them is priceless! 


Monday, July 22, 2013

Bamboo hanging lamp

Finally I have found what I have been looking for so long! I have always wanted to have in my bedroom a nice bamboo lamp. Unfortunately most of the ones I have seen are very expensive... way out of my budget. Just like this one:


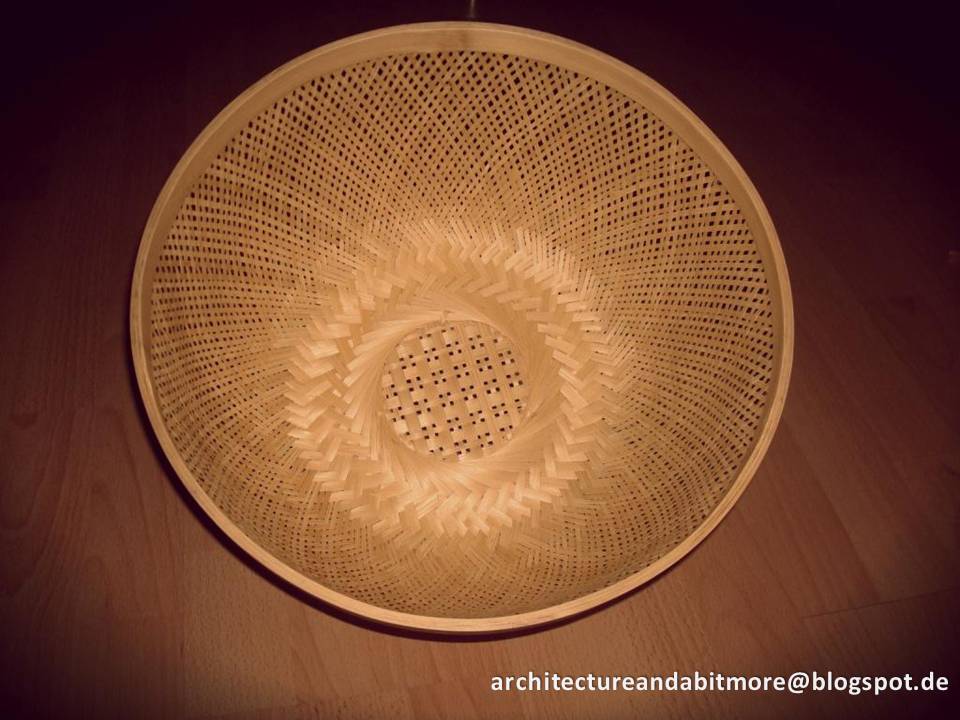
Last week I went for a walk and found a store where they were selling this nice bamboo food cover. 

When I saw it... it was love at first sight! haha :) I read: bamboo food cover but in my mind what I was just looking at was my new bedroom lamp. 


I could not wait to come home and transform this amazing thing. I love the texture, the color. I love everything about it.


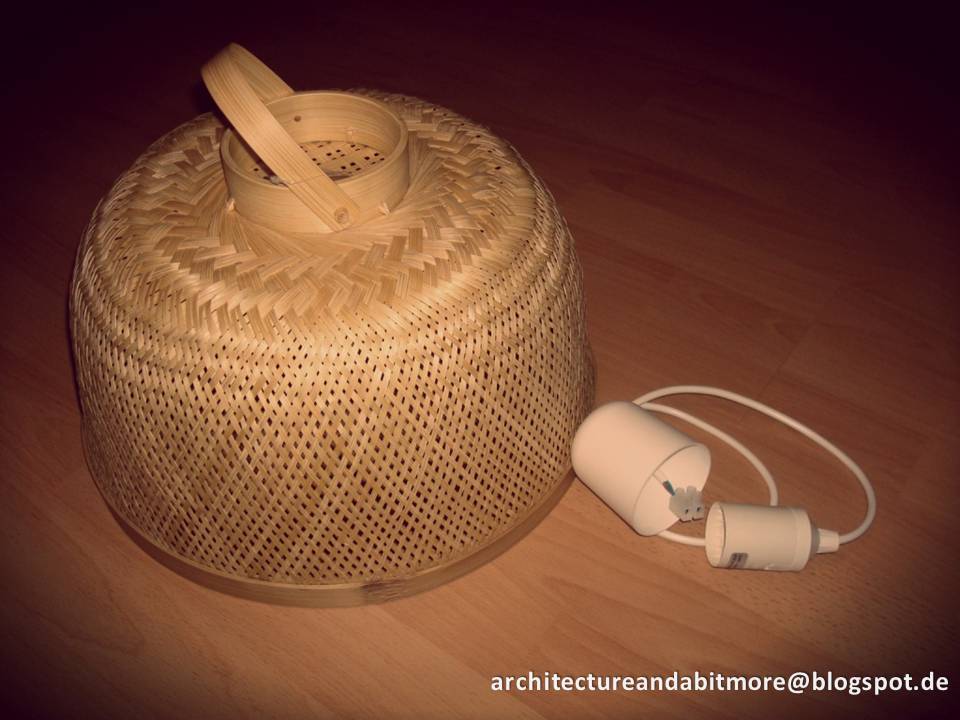
As you can see, it was super easy to transform it into a lamp. 


I love it so much! It is exactly what I was looking for and I did not have to spend a lot of money.

Do you like it? 

Monday, June 24, 2013

Toilet paper rolls decoration

This is one of my favorite handcrafts. It took me a while to do it, but it really worth it! For this project I had to collect like... who knows how many toilet paper rolls. It took a little while, but once I had enough... it was time to start my work.

I started cluing the flower in the center and then I continued gluing the paper rolls around it. You have to wait until some are dried on order to continue gluing the others around. 

At the end you can paint it with any color that you like. I decided to leave it with the natural color, because it combines with the color of the walls. 


The project its not difficult, but it requires a lot of time. So if you are a very patient person, you can start doing this project as soon as possible.

Who would believe that this nice wall decoration has been made out of toilet paper rolls isnt? I bet that if you paint it, nobody will ever find out what it is really made of.

Monday, June 17, 2013

Birthday Party Déco - DIY

Birthday parties and all kind of events are always a good excuse to put your imagination to work. You can really have an original party adding your own creativity to it. That way you can be 100% sure: NOBODY is going to have a party like yours.


What I will show you today are a couple of handcrafts and some other little things for a birthday party inspired in the "Smurfs". 


Luckily I found this smurf gummies at the supermarket. To serve them in an original and very simple way, I put them in a glass tray but in the center I put a glitter smurf sticker and then I put the gummies around it. There is not a big "science" on this, but just notice what a nice thing you can do with such a little detail.

I made some nice DIY napkin rings using some toilet paper rolls. Most of the times you throw away the toilet paper rolls, but there are so many other uses that you can give to them. (another example to apply the 3 R´s rules) 


Here you can see the nice napkin rings and a DIY Smurf hat made of cardboard and smurfs gift paper. 

Once again I prove you that you don´t need to spend a lot of money to be able to make something nice. 

Your kids will love it and it will give you satisfaction to have done everything yourself. 


Sunday, June 16, 2013

Birthday party DIY Décor

Birthday party DIY Décor

If you have a party at home and you are looking for ideas of how to decorate the tables, here I present you something really easy and very nice to do.

I am sure your guests will love it! I made it for the birthday party of a cousin and all the guests told me that the decoration looked very nice.

If you have enough time to do your own decoration, don´t hesitate to do it. Don´t be afraid if its your first time. Believe me: YOU CAN DO IT! 

Here I give you the supplies that I used:

* glass vases
* ribbons ( you pick the colors) 
* decorative butterflies
* lemons
* fresh flowers (and water)


If you have some questions, write me to: architectandabitmore@gmail.com

Christmas table decór

This is a modern and a different way to decorate the dining table for a special dinner with friends and family. 

This was a Christmas dinner. As we know, the traditional Christmas colors are red, green and gold. Each of those colors have their own meaning. But if you want to use some other colors, here is a proposal.